Brief Description
During the activity, students build a star lantern, allowing them to learn that constellations were created by people and are composed of stars. Students learn how to recognise some constellations.
Goals
Students learn that constellations are made up from different stars. Students recognise and name different constellations. Students develop creativity skills and imagination by constructing a lantern and drawing. They develop curiosity for the night sky and presentation skills.
Learning Objectives
After implementation, students will be able to:
- name some constellations and describe their shapes,
- explain that a constellation is a pattern that links several stars,
- explain that constellations are imaginary patterns created by people a long time ago.
Evaluation
- Ask the students if they know what stars are.
- Encourage the students to show their constellations and say what they represent.
- Encourage the students to describe what figures they can see in the stars.
- Show a picture of the night sky at the end of the activity, and ask students to recognise or find a constellation.
Materials
- Worksheet (PDF) (If you do not have a printer, you can use a model that you can prepare before. Students will use the model to make the constellation on the lantern.)
- Coloured A3 card sheet, one per student
- Lantern lights, one per student
- Embroidery needles and newspaper
- Sticks to hold the lantern, one per student
- Crepe paper and tissue paper in different colours
- Brushes
- A4 paper or printed sky maps
- Luminous paint (or normal paint)
- Glue
- Stapler
- String
- Camera (optional)
Background Information
What is a star?
A star can be described as a big ball full of burning gases, essentially helium and hydrogen, kept together by its own gravity. Stars emit light and heat and appear in the night sky as a multitude of luminous points. The closest star to the Earth is the Sun. If the distance between the Earth and the Sun was 1 meter, the next nearest star (Proxima Centauri) would be at 260,000 km away from us!
Why do we see stars better during the night?
Stars are always in the sky, both during night and day. But when it is day, the Sun, our own star lights up the sky and makes it so bright that we cannot see other stars, which are further away. On the other hand, when it is night, the sky gets dark and the light of stars further away becomes visible. To demonstrate this to students, you can use an activity about day and night.
Origin of the Constellations
Ever since people first wandered the Earth, great significance has been given to celestial objects seen in the sky. Throughout human history and across many different cultures, names and mythical stories have been attributed to the star patterns in the night sky to remember and recognise them more easily, thus giving birth to what we know as constellations.
When were the first constellations recorded?
Archaeological studies have identified possible paintings representing constellations, for example, on the walls in a cave system at Lascaux in southern France made almost 17,300 years ago. The ancient Greeks were the first to describe over half of the 88 constellations recognised by the International Astronomical Union today. Between the 16th and 17th century AD, European astronomers and celestial cartographers added new constellations to the 48 previously described by Ptolemy; these new constellations were mainly ‘new discoveries’ made by the Europeans who first explored the Southern Hemisphere.
People used constellations for many different reasons. This fastened the discovery of new constellations. The first uses were probably religious but constellations had mainly practical uses. For example, in agriculture, constellations could help determine when the seasons were coming before using calendars. Constellations also helped navigators and explorers to find their way across the planet. Nowadays, astronomers still use the names of constellations to identify where a celestial object can be seen in the sky.
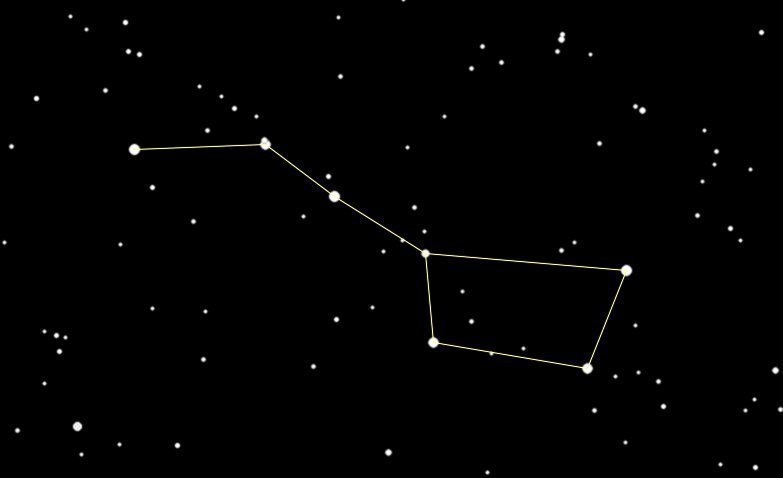
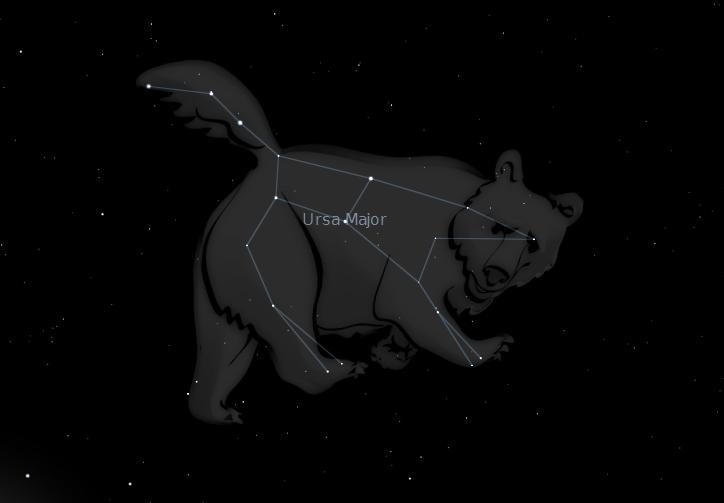
Constellation Figures
In star maps, it is common to mark ‘line patterns’ of the shape that makes a constellation. Famous ones include Orion and Ursa Major (illustrated below). However, the IAU defines a constellation by its boundary (indicated by sky coordinates) and not by its pattern and the same constellation may have several variants in its representation. The constellations should be differentiated from asterisms. Asterisms are patterns or shapes of stars that are not related to the known constellations, but nonetheless are widely recognised by laypeople or in the amateur astronomy community. Examples of asterisms include the seven bright stars in Ursa Major known as ‘the Plough’ in Europe or ‘the Big Dipper’ in the United States of America.
The big dipper is part of the Ursa Major constellation.
Text adapted from the constellations page - International Astronomical Union, http://www.iau.org/public/themes/constellations/
Full Activity Description
Preparation
For the activity ‘Make a Star Lantern’, copy the constellations from the worksheet onto various colours of A3 card. Provide lights for the lanterns or ask the students to bring their own.

Image: This ground-based photo shows a wide angle view of the constellation Corvus and part of contellation Hydra. Credit: NASA, ESA, Z. Levay (STScI) and A. Fujii
Activity 1: What constellations do you recognise?
Step 1:
Sit in a circle with the students. Ask the students if they know what stars are.
Step 2:
Explain that you can see the stars best at night. Stars give light but during the day, the Sun, our star, gives so much light that we cannot see the others.
Step 3:
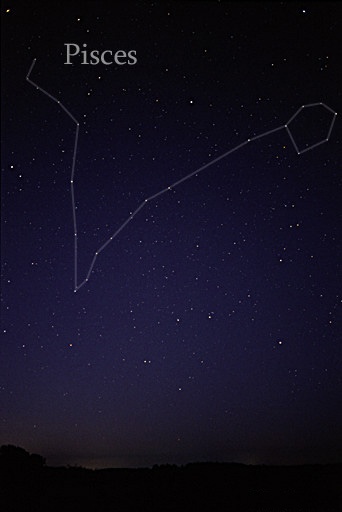
Place the drawings of the constellations on the worksheet in the middle of the circle. From top to bottom the constellations shown are: Leo (lion), Pisces (a pair of fish), and Scorpio (scorpion).
Step 4:
Encourage the students to describe what figures they can see in the stars. Explain that we call these figures constellations.
Step 5:
Look at each constellation and describe what it is supposed to look like and what it is called. Explain that long ago, people thought this was what the constellations looked like if you joined up the stars.
Activity 2: Make a star lantern
Step 1:
Give each child a sheet of A3 card with a copied constellation, an embroidery needle and a thick layer of newspaper.
Step 2:
Ask the students to prick holes in the points of the star sign, using the layers of newspaper as a pad under the card. Encourage them to prick big holes, or the light won't shine through them clearly.
Step 3:
Roll the card to form a cylinder and staple the edges together.
Step 4:
Make two holes at the top and tie a piece of string across.
Step 5:
Hang the lantern on the stick and use a piece of string to hang the lamp inside the lantern. The lanterns are ready.
Tip: Encourage the children to make small balls of crepe paper. They can paste these onto their lantern, but make sure they don’t cover the holes. When the children have finished decorating the card, put the lanterns aside to dry. You can paste coloured tissue paper on the inside of the lantern for a nice effect.
Activity 3: Let the stars shine
Step 1:
Turn off the lights and/or close the blinds in the classroom.
Step 2:
Ask the students to switch on their lantern lights.
Step 3:
Ask them what they can see on their lantern.
Step 4:
Explain that the spots of light on their lantern form a constellation. The lights are the stars.
Optional: Take and print a photograph of each child with their lantern. Can you recognise the constellations on the photographs? Compare the constellation with a real picture of the sky.
You can show pictures of other famous and bright constellations.
Step 5:
Explain that we cannot always see the same constellations; some are not visible during the whole year. This is because the Earth is spinning and moving around the Sun. This gives us the impression that the stars are moving.
 Image: Illustration of the ‘zodiac band’ with a few of the constellations depicting the objects they represent. Credit: LPI USRA
Design your own constellation
Step 1:
The students use luminous paint to paint their own constellation on paper or on a sky map. They can make it any shape they like. They can use existing stars on the sky map or draw their own on white paper.
Step 2:
Explain that they can paint spots (to represent the individual stars), or they can choose to make a drawing of the constellation using the luminous paint. Let the paintings dry on the windowsill or near the radiators.
Step 3:
Once the paintings are dry, make it dark in the classroom. Encourage the students to show their constellations, give them a name, and say what they represent.
Step 4:
Show a picture of the night sky at the end of the activity, ask students if they recognise or can find a constellation.
Step 5:
Encourage the students to look at the real night sky at night and find constellations.
Safety note: this activity uses embroidery needles for building the lanterns and requires supervision.


Curriculum
Space Awareness curricula topics (EU and South Africa)
Our wonderful Universe, stars, constellations
Space Awareness curricula topics (EU and South Africa)
Our Wonderful Universe, stars, constellations
National Curricula UK
KS1 - Art and Design: use drawing, painting, and sculpture to develop and share their ideas, experiences, and imagination.
Additional Information
To check if the constellations discussed during the activity are visible in the sky at the time of the activity, you can download free software like Stellarium, http://stellarium.org/. The more famous and bright constellations could be used, e.g., Cassiopeia, Ursa Major, Orion, or Cygnus.
Conclusion
Students build a star lantern. By implementing this activity, students learn that people have created constellations. They learn that a constellation is composed of different stars and can recognise some of them.
This resource was developed by ESERO NL/ESA, peer-reviewed by astroEDU, and revised by Space Awareness.

